


Geography is a fascinating subject that helps us understand our planet and the complex relationship between people and places. However, learning about physical features like towering mountains, deep valleys, and winding rivers can sometimes feel abstract when viewed only on flat, two-dimensional maps. These traditional maps, while essential for location and boundaries, often struggle to convey the dramatic variation in elevation and topography that truly shapes the Earth's surface and human activity. This is where the power of tactile learning, specifically through the use of raised relief maps, comes into play, offering a dynamic and engaging alternative.
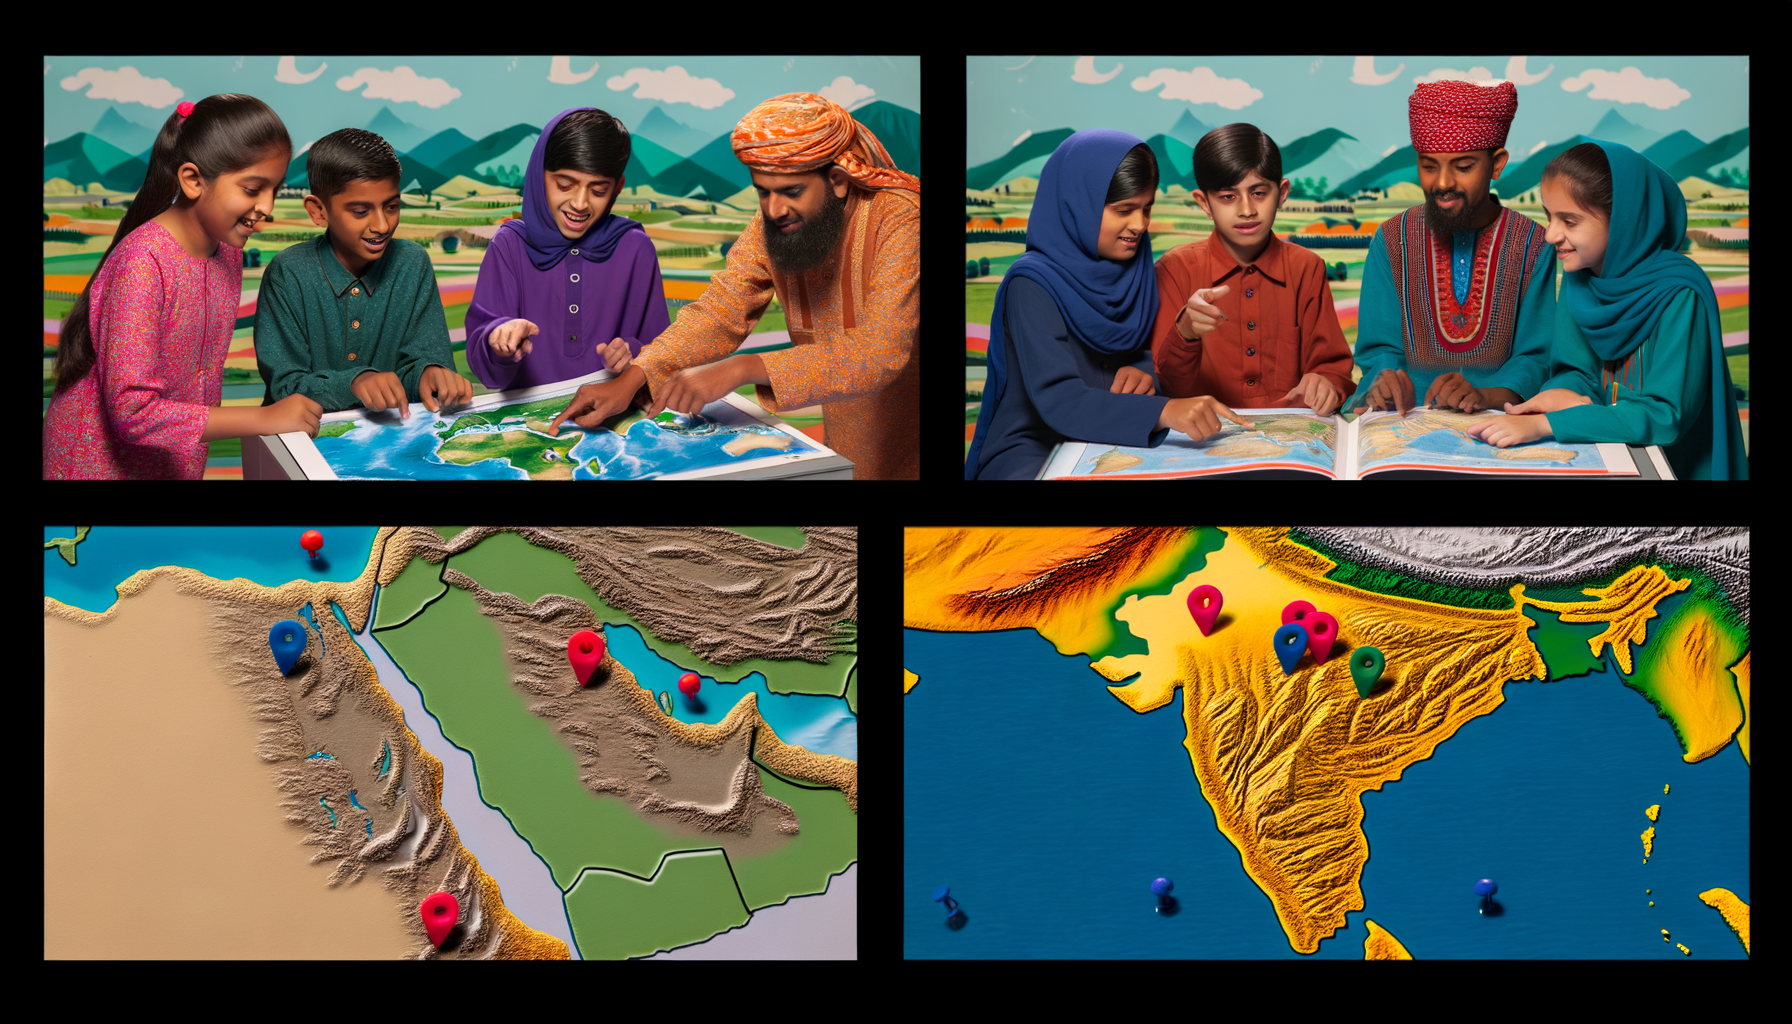
Raised relief maps are three-dimensional representations of geographical areas, where the elevation differences are molded or sculpted to be physically felt and seen. They provide a tangible connection to the landscape, allowing learners of all ages to literally grasp the concepts of elevation, slope, and landforms. For educators, parents, and anyone passionate about geographic discovery, these maps offer an invaluable tool to transform potentially dry lessons into exciting, hands-on explorations. They cater to different learning styles, making geography accessible and enjoyable.
If you're looking for innovative ways to teach or learn about physical geography, raised relief maps are a game-changer. They move beyond simple memorization of locations and delve into understanding *why* places are the way they are, shaped by geological forces over millennia. This post will guide you through five fun and effective geography activities that harness the unique capabilities of raised relief maps, providing concrete methods to enhance understanding and spark curiosity about the world's diverse landscapes. Get ready to unlock a deeper, more interactive way to experience geography.
Why Raised Relief Maps Matter in Geography Education
Traditional maps are indispensable for showing political borders, cities, and distances, relying heavily on symbols and color codes to represent elevation. While effective for navigation and political geography, they often fail to adequately illustrate the physical challenges and opportunities presented by the terrain itself. A mountain range might just be a shaded area or a series of contour lines on a flat map, which doesn't convey its actual height or steepness. This abstract representation can make it difficult for learners, especially younger ones, to truly visualize and appreciate the physical world.
Raised relief maps overcome this limitation by adding the crucial third dimension. They physically show the peaks and valleys, the slopes and plateaus, allowing users to touch and feel the terrain. This tangible representation provides a much more intuitive understanding of topography than looking at a flat surface. It bridges the gap between abstract symbols and the concrete reality of the landscape, making geographical concepts like watershed divides, mountain passes, and coastal plains immediately understandable through physical interaction.
For students who are visual or kinesthetic learners, raised relief maps are particularly beneficial. They provide a multi-sensory experience that enhances retention and comprehension. Touching the map while discussing landforms reinforces the visual information, creating a stronger memory trace. This tactile engagement transforms passive learning into an active, exploratory process. Furthermore, they can help explain complex phenomena like weather patterns influenced by mountains or the impact of terrain on historical events and human settlement patterns, providing a richer context for geographical study.
The Power of Tactile Learning in Geography
Tactile learning, or learning through touch, is a powerful educational approach that engages the brain through physical interaction. It's based on the principle that experiencing something physically can lead to deeper understanding and better retention than solely relying on sight or hearing. In the context of geography, where we study the physical features of the Earth, touch provides a direct connection to concepts that are fundamentally about shape, form, and variation.
When a student runs their fingers over the raised areas of a relief map, they are directly experiencing the concept of elevation. They can feel how a mountain rises steeply, how a valley dips low, or how a plateau remains relatively flat but elevated. This physical sensation is processed by the brain in a different way than simply seeing a contour line or a color gradient on a 2D map. It makes the abstract idea of "high" and "low" concrete and intuitive, laying a strong foundation for understanding more complex geographical principles.
Tactile learning with raised relief maps also encourages exploration and curiosity. Learners are naturally drawn to touch the map, to trace rivers, to feel the extent of a mountain range. This exploration is self-directed and engaging, making the learning process more enjoyable and less like a chore. It allows for discovery-based learning, where students can explore the map independently and ask questions based on their physical observations. This active engagement fosters a love for geography and a deeper appreciation for the Earth's diverse landscapes. It's not just about knowing *where* something is, but understanding *what* it feels like to traverse that terrain conceptually.
Preparing for Your Raised Relief Map Adventures
Before diving into the activities, ensure you have a good quality raised relief map. The size and detail will depend on your needs – a large wall map is great for group activities, while smaller desktop maps or globes might be better for individual exploration or focusing on specific regions. Make sure the relief is pronounced enough to be easily felt and distinguished; some maps have very subtle relief which might not be as effective for tactile activities. Consider maps of your local area, state, country, or even continents or the world, depending on the scale of your study.
Gather any supplementary materials that might be helpful. This could include small markers or flags to identify locations, playdough or clay to model landforms alongside the map, printed photos of actual landscapes represented on the map, or even small toy figures or vehicles to represent journeys. Having these items on hand can enhance the activities and provide additional layers of engagement. A good light source can also help highlight the shadows cast by the relief, making the three-dimensional aspects even more apparent visually.
Set the stage for discovery. Create a comfortable and open environment where learners feel free to touch and explore the map without reservation. Encourage questions and discussions as they interact with the terrain. Remember, the goal is not just to complete the activity, but to spark curiosity and build a tangible understanding of geographical concepts through hands-on exploration. Let the physical map be the centerpiece of your geography lesson, inviting interaction and investigation from the moment learners see it.
Activity 1: Landform Identification and Exploration
The Basics: Feeling the Earth's Surface
This foundational activity is perfect for introducing or reinforcing the concepts of basic landforms. Flat maps use symbols or colors to denote mountains, valleys, plateaus, and plains, but the raised relief map allows learners to experience these features physically. It transforms abstract definitions into concrete, touchable realities. By feeling the map, students gain an intuitive understanding of what these terms actually represent in terms of elevation change and shape.
The goal is for learners to associate the physical sensation of the raised map with the names and characteristics of different landforms. This direct sensory input makes the learning process much more effective and memorable than simply looking at a picture or reading a definition. It's about building a vocabulary of the physical world through touch and sight working together. It helps solidify the understanding that these aren't just names on a map, but actual physical features of the Earth with distinct forms.
How to Play and Learn
Begin by introducing the map and explaining that the raised areas represent higher elevation, and the lower areas represent lower elevation. Invite learners to simply touch and explore the map freely for a few minutes, encouraging them to describe what they feel. Ask open-ended questions like, "What do you notice about this part here?" or "How does this area feel different from that area?" This initial exploration phase is crucial for building familiarity and sparking initial observations based on the tactile experience.
Next, introduce specific landform terms one by one, demonstrating each on the map. For example, point to a large, high, rugged area and say, "This is a mountain range. Feel how high and bumpy it is?" Then move to a low area between mountains and say, "This is a valley. Feel how it dips down?" Show a relatively flat but elevated area as a plateau, and a large, flat, low-lying area as a plain. Use descriptive words that relate to the tactile sensation. Encourage learners to repeat the terms and feel the corresponding areas on the map.
Once the basic landforms have been introduced, turn it into a game. Call out a landform name and have the learner find and point to or touch an example on the map. Or, point to an area on the map and ask the learner to name the landform. You can also use small flags or markers to label different landforms once identified, reinforcing the connection between the word, the physical form, and its location on the map. This interactive questioning and finding reinforces the learning in a fun, low-pressure way.
Variation: Guess the Landform
For a slightly more challenging version, have the learner close their eyes or use a blindfold (with assistance for orientation, of course). Guide their hand to a specific spot on the raised relief map and have them feel the area. Based solely on the tactile information – is it high or low, steep or flat, rugged or smooth? – they must try to identify the landform. This variation relies purely on the tactile input, highlighting the unique advantage of the raised map.
After they make their guess, have them open their eyes and look at the area they felt to confirm their answer. Discuss what tactile clues led them to their conclusion (e.g., "It felt very high and bumpy, so I thought it was a mountain"). This helps them articulate the physical characteristics associated with each landform. You can rotate roles, allowing the learner to choose spots for you to identify by touch, making it a collaborative discovery process. This deepens their understanding of the physical attributes that define different geographic features.
This activity not only helps learners identify landforms but also encourages them to think critically about how these features are defined by their shape and elevation. It builds a strong foundation for understanding more complex geographical concepts related to topography and its impact on the environment and human life. It's a simple yet powerful way to engage with the physical world represented by the map, moving beyond passive observation to active tactile interpretation.
Activity 2: Topographical Storytelling
Weaving Narratives Across the Landscape
Geography isn't just about static features; it's also about movement, journey, and interaction with the landscape over time. Topographical storytelling uses the raised relief map as a dynamic stage upon which narratives unfold, guided by the terrain. This activity encourages creativity and helps learners understand how physical geography influences movement, settlement, and human endeavors. It connects the physical features of the map to real-world scenarios and historical possibilities.
By creating stories that involve traveling across the map, learners must consider the challenges and opportunities presented by the terrain. Would it be easy or difficult to cross that mountain range? Where would you find a good place to build a village near a river? This process requires them to interpret the physical map not just as shapes, but as a landscape that facilitates or hinders movement and activity. It transforms the map from a static object into a dynamic setting for imaginative journeys.
Setting the Scene and Crafting the Journey
Choose a starting point and an ending point on the map. This could be between two cities, from a coast to an interior region, or from a low plain up into a mountainous area. Introduce a scenario – perhaps a group of early explorers seeking a new route, a merchant caravan transporting goods, a migrating animal herd, or even modern-day hikers on a long trail. Give the travelers a goal related to their journey. This narrative framework provides context and purpose for interacting with the map's features.
Now, collaboratively or individually, plan the route for the travelers across the raised relief map. As you trace the potential path with a finger or a small marker, discuss the terrain they would encounter. "Our travelers are leaving the coast and need to get to the city inland. Look, there's a big mountain range in the way. Should they try to go straight over it? Or would it be easier to follow this valley or river around it?" Talk about the difficulties of climbing steep slopes versus the relative ease of traveling through flatter areas or following river valleys.
As the story progresses, incorporate geographical details observed on the map. Maybe the travelers encounter a river that's too wide to cross easily in the mountains but opens up in the plains. Perhaps they find a mountain pass that offers a less difficult route, or they decide to build a temporary camp in a sheltered valley. Use descriptive language inspired by the tactile experience of the map – "They struggled up the rocky, steep mountain," or "They rested in the wide, flat plain." This makes the story directly tied to the map's physical features.
This activity can be adapted for different age groups and complexity levels. Younger learners might focus on simple journeys and basic landform descriptions. Older learners could incorporate concepts like elevation gain and loss, climate zones changing with altitude, or even historical influences of terrain on settlement patterns or battles. You can also add elements like finding resources (represented by markers on the map), avoiding obstacles, or reaching checkpoints. The raised relief map provides a realistic and engaging backdrop for these spatial narratives.
Activity 3: Water Flow and Drainage Basins
Following the Water's Path
Understanding how water flows across the landscape is a fundamental concept in physical geography, crucial for understanding rivers, lakes, erosion, and resource management. Flat maps can show rivers and lakes, but they don't inherently illustrate *why* a river flows where it does or how drainage systems are organized. Raised relief maps provide an intuitive way to visualize the principles of hydrology and drainage patterns.
The physical slopes and depressions on a raised relief map immediately demonstrate the concept of "downhill." Water always flows from higher elevations to lower elevations, following the path of least resistance created by the terrain. Using the map, learners can see how mountain ranges act as divides, separating drainage basins, and how smaller streams merge into larger rivers as they flow towards the sea or a lake. This activity makes the often-abstract concept of a watershed tangible.
Hands-On Simulation (Conceptual)
*Important Note: Do not use actual liquid water on most raised relief maps, as it can damage the material.* This activity uses the tactile nature of the map to simulate water flow conceptually. Begin by identifying the highest points on the map, such as mountain peaks or high plateaus. Explain that these areas often act as the source regions for rivers and streams because water (from rain or melting snow) collects here and begins its journey downhill.
Using a finger or a pencil eraser, trace hypothetical paths that water would take from a high point. Encourage learners to feel how the path naturally follows the slopes downwards, collecting in valleys and depressions. Trace how multiple small streams coming from different parts of a mountainous area might merge into a larger river flowing through a main valley. Follow this river's path downstream, noting how other smaller rivers (tributaries) join it along the way.
Introduce the concept of a drainage basin or watershed – the area of land where all the water drains into a particular river system. Use the raised relief map to identify the ridges and high points that form the boundaries of a major drainage basin. Show how water falling on one side of a ridge flows into one river system, while water falling on the other side flows into a different one. The raised relief clearly illustrates these drainage divides. For example, trace the boundary of the Mississippi River basin on a relief map of the United States, showing how it's bordered by the Rockies to the west and the Appalachians to the east, with water from vast areas flowing into the central valley.
You can also discuss how lakes form in depressions or behind natural dams created by geological activity, and how some rivers flow into these lakes while others flow out. Explore areas of internal drainage where water collects in basins with no outlet to the sea. This tactile exploration of water paths reinforces the fundamental role of topography in shaping hydrological systems. It moves beyond simply identifying rivers to understanding the forces that dictate their form and flow, making the map a dynamic representation of natural processes.
Activity 4: Contour Line Concepts Made Real
Bridging 2D and 3D Understanding
Contour lines are a standard feature on two-dimensional topographical maps used to represent elevation. They connect points of equal elevation above a reference point (usually sea level). While essential for reading topographic maps, contour lines can be a difficult concept for learners to grasp initially because they are an abstract way of representing a three-dimensional reality on a flat surface. Understanding how contour lines relate to the actual slope and shape of the land is crucial for advanced map reading.
A raised relief map provides an invaluable bridge between the abstract representation of contour lines and the physical reality of the terrain they describe. By using a relief map alongside a standard topographic map of the same area, learners can visually and tactilely connect the lines on the flat map to the actual rises and falls of the land. This side-by-side comparison and physical exploration makes the concept of contour lines significantly more intuitive and easier to understand. It deciphers the code of the 2D map by showing what those lines look like in 3D.
The Tactile Contour Map
Begin by showing a standard topographic map and explaining what contour lines are – lines connecting points of equal elevation. Point out the contour interval (the difference in elevation between adjacent contour lines). Then, bring out the raised relief map of the same area. Show how the contour lines on the 2D map correspond to specific "levels" on the 3D map. You can even draw or place markers on the relief map to represent specific contour lines, visually highlighting the elevation steps.
Have learners trace a contour line on the flat map with their finger, noting how it might curve around a hill or follow a valley. Then, have them find the corresponding elevation level on the raised relief map and trace along that level with their finger. They can feel that following a contour line means staying at the same elevation – their finger doesn't go up or down, only sideways along the map's surface at that specific height. This physical action directly demonstrates the definition of a contour line.
Next, discuss the spacing of contour lines. Show areas on the 2D map where contour lines are close together and areas where they are far apart. Have learners feel the corresponding areas on the raised relief map. They will physically feel that closely spaced contour lines correspond to steep slopes (the elevation changes rapidly over a short horizontal distance on the 3D map), while widely spaced lines correspond to gentle slopes or flatter areas (the elevation changes slowly). This tactile confirmation makes the relationship between contour spacing and slope immediately clear.
Explore how the shape of contour lines represents different landforms. Show how contour lines form closed loops around hills or mountains, with higher elevation loops inside lower ones. Show how they V-shape when crossing valleys or ridges, with the V pointing upstream in a valley (towards higher elevation). Have learners feel these shapes on the 3D map and see how the V-shape contours correspond to the actual dip of a valley or rise of a ridge. This activity transforms abstract lines into meaningful indicators of terrain shape, making standard topographic maps much more accessible and understandable.
Activity 5: Planning a Route or Expedition
The Adventurer's Challenge
Applying geographical knowledge to real-world problems is a key aspect of the discipline. This activity uses the raised relief map to simulate the practical challenge of planning a route, requiring learners to consider the impact of terrain on travel time, difficulty, and feasibility. It moves beyond simply identifying landforms to analyzing how those landforms affect movement and strategy. This is a fantastic way to integrate physical geography with critical thinking and problem-solving skills.
Whether planning a hiking trip, a historical military campaign, a search and rescue mission, or the route for a new road or pipeline, understanding the topography is paramount. A raised relief map provides a much more intuitive surface for this kind of planning than a flat map. You can physically trace potential routes and immediately see and feel the challenges and opportunities presented by mountains, valleys, rivers, and plains. It makes the consequences of choosing one path over another immediately apparent through the physical terrain.
Mapping the Journey
Present a scenario and a goal. For example, "You need to travel from point A to point B on this map. Point A is in this valley, and point B is over that mountain range. Plan the easiest route." Or, "Plan the fastest route, considering that going over mountains is slow." Or, "Plan a route that follows rivers as much as possible," or "Plan a route that avoids crossing any significant bodies of water." Define the criteria for a "good" route based on the scenario (e.g., easiest, fastest, shortest, safest).
Using fingers, string, or a flexible marker, have learners explore different potential paths on the raised relief map. As they trace a possible route, prompt them to think about the terrain they are traversing. "If you go this way, you have to climb this steep mountain. How will that affect your travel time?" "If you go this way, you can follow this flat valley for a long distance. Is that better?" Encourage discussion about the trade-offs of different routes – is a longer route through easy terrain better than a shorter route over difficult terrain?
For more advanced learners, introduce constraints or resources. For example, "You have limited supplies, so you need to find a route that passes by a river for water." Or, "You need to reach point B before nightfall, so you must avoid the steepest slopes." You can also incorporate other map features if available, such as identifying potential camp sites in sheltered areas or recognizing chokepoints where the terrain narrows. The raised relief map provides a realistic and engaging environment for this type of spatial reasoning and strategic planning.
After planning a route, have the learner explain *why* they chose that particular path, referencing the specific landforms and elevation changes encountered along the way. This requires them to articulate their understanding of how terrain impacts travel. Comparing different planned routes and discussing their pros and cons based on the physical map reinforces the practical application of geographical knowledge. This activity is excellent for developing spatial awareness, problem-solving skills, and an appreciation for the challenges and opportunities presented by the Earth's diverse topography in real-world contexts, from logistics to exploration.
Beyond the Core Activities: Expanding the Horizon
The five activities described above are just starting points for using raised relief maps. Their tactile nature and three-dimensional representation make them versatile tools for exploring a wide range of geographical concepts and integrating geography with other subjects. Think of these maps not just as static display items, but as interactive learning stations that can be revisited and utilized in numerous creative ways. Their utility extends far beyond simple landform identification.
Consider using different types or scales of raised relief maps. A large wall map of a continent can be used to understand major mountain ranges and river systems on a grand scale. A smaller, highly detailed map of a specific national park or region allows for exploration of micro-topography, smaller valleys, and local watersheds. Comparing maps of different scales helps learners understand how physical features appear differently depending on the viewing perspective and level of detail. Exploring a relief map of your local area can create a powerful connection between classroom learning and the world immediately around you.
Integrate raised relief maps with other learning resources. Use them alongside satellite imagery or aerial photographs to see how the physical forms represented on the map appear in real life. Compare the raised relief map to historical maps of the same area to discuss how understanding the terrain was crucial for historical events, settlement, or infrastructure development. Research the geology of the area represented on the map to understand *how* those landforms were created, linking geography to earth science.
Use the map as a visual and tactile aid for teaching related concepts. Discuss how elevation affects climate and vegetation zones, pointing to different heights on the map. Explain how landforms influence weather patterns, such as the rain shadow effect caused by mountains. Use small objects to represent cities, roads, or resources on the map and discuss how their placement was influenced by the topography. The raised relief map serves as a constant, tangible reference point for these interconnected geographical ideas, making abstract concepts easier to visualize and understand in their physical context. It encourages learners to think about the Earth's surface as a complex, interconnected system, where physical form plays a fundamental role.
Choosing the Right Raised Relief Map
Selecting the appropriate raised relief map is crucial for maximizing its educational value. There are several factors to consider, including the scale, the geographical area covered, the level of detail, the materials used, and the intended use (classroom, home, individual study). A map that is too small or has insufficient relief might not provide the tactile experience needed for these activities, while one that is too large or detailed might be overwhelming or impractical for your space. Taking the time to choose wisely will ensure your investment yields the best learning outcomes.
Consider the scale and area. Are you focusing on global physical geography, a specific continent, a country, a state, or even a smaller region or national park? Larger scale maps (showing a smaller area in more detail) are excellent for exploring micro-topography and performing activities like route planning with precision. Smaller scale maps (showing a larger area with less detail) are better for understanding major geographical features and comparing different regions globally. Choose a map that aligns with the specific learning objectives you have. If you teach about your local environment, a regional relief map will be incredibly impactful.
Evaluate the level of relief and detail. Some relief maps have a relatively subtle elevation difference, while others have dramatically exaggerated vertical scales to make the topography more apparent. For tactile learning and visualizing landforms, a map with noticeable, easy-to-feel relief is generally preferable. Check if the map includes other relevant geographical information, such as major rivers, lakes, cities, and political boundaries, as these can be useful reference points during activities. However, ensure these features don't obscure the physical relief itself.
Materials and durability are also important, especially in a classroom setting where the map will be handled frequently. Most raised relief maps are made from vacuum-formed plastic, which is durable but can be damaged if not handled with care. Consider how the map will be displayed or stored. Wall maps require appropriate mounting space, while desktop maps or globes need a stable surface. Some specialized maps might use other materials, but plastic is common due to its cost and moldability. Read reviews or, if possible, physically inspect the map before purchasing to get a sense of its quality and the prominence of the relief. A well-chosen map can be a valuable educational resource for many years, providing countless opportunities for tactile geographic exploration.
Conclusion: Making Geography Tangible and Exciting
Geography is a dynamic and engaging subject, and raised relief maps provide a powerful tool to bring its physical aspects to life. Moving beyond flat, two-dimensional representations, these tactile maps allow learners to physically interact with the Earth's surface, making abstract concepts like elevation, landforms, and topography concrete and understandable. The five activities discussed – Landform Identification, Topographical Storytelling, Water Flow and Drainage Basins, Contour Line Concepts Made Real, and Planning a Route – offer diverse and fun ways to leverage the unique benefits of raised relief maps.
By incorporating tactile learning into geography lessons, educators and parents can cater to different learning styles, enhance comprehension and retention, and spark genuine curiosity about the physical world. These activities encourage exploration, critical thinking, and a deeper appreciation for the forces that shape our planet. They transform passive observation into active discovery, turning the study of geography into an exciting adventure across mountains, valleys, and plains that can be felt under one's fingertips.
Whether you are a teacher looking to enrich your classroom curriculum, a homeschooling parent seeking engaging resources, or simply a geography enthusiast wanting a more immersive way to explore the world, consider adding a raised relief map to your collection. It is more than just a map; it is an invitation to touch, explore, and understand the Earth's incredible surface in a way that flat maps simply cannot replicate. Unlock the potential of tactile geography and watch as the landscape of learning comes to life for you and your students. Get your hands on a relief map and start exploring the world in three dimensions today!