


The Intricate Process of Manufacturing Raised Relief Maps
Introduction: Bringing Topography to Life
Have you ever run your fingers across a raised relief map, feeling the mountains rise and the valleys dip? These aren't just flat images on paper; they are tangible, three-dimensional representations of our planet's surface, offering a unique perspective that conventional maps simply cannot provide. They capture the imagination, making complex geographical data immediately understandable and wonderfully tactile for learners and enthusiasts alike.Creating these fascinating geographical tools is far from a simple task; it involves a sophisticated blend of data science, precision engineering, specialized printing techniques, and skilled craftsmanship. The journey from raw elevation data to a finished, touchable map is a complex, multi-stage process that demands accuracy and expertise at every turn. Whether you're a map enthusiast, an educator, a designer considering using these maps, or simply curious about how such intricate objects are made, understanding the manufacturing process deepens appreciation for the final product.
This post will take you on a detailed tour through the intricate world of raised relief map production. We will uncover the key stages involved, from the initial acquisition and processing of geographical data to the delicate steps of forming the relief and printing the final map image onto a three-dimensional surface. By exploring each phase, we aim to provide a comprehensive solution to your curiosity, revealing the technical challenges and innovative techniques that make these incredible maps possible and showcasing why they remain a valuable educational and navigational tool in our increasingly digital world. Prepare to delve into the fascinating intersection of technology, manufacturing, and geographical art.
More Than Just a Map: What Defines a Raised Relief Map?
Defining the Concept
A raised relief map is a topographic map that uses a three-dimensional model to represent changes in elevation across a specific geographical area. Unlike standard contour maps that show elevation through lines, relief maps provide a tangible, physical representation of hills, mountains, valleys, and other landforms. This physical dimension allows users to not only see but also feel the shape of the terrain, providing a more intuitive understanding of the landscape's structure.The relief is typically exaggerated vertically compared to the horizontal scale to make the elevation changes more apparent and impactful. Without this vertical exaggeration, many topographical features, especially in areas with gentle slopes, would be too subtle to perceive visually or tactilely. This deliberate distortion is a key characteristic that enhances the map's effectiveness as a teaching tool and visual aid.
These maps serve various purposes, ranging from educational tools in classrooms to planning aids for engineers and hikers, and even decorative pieces for homes and offices. Their ability to convey complex topographical information in an accessible format makes them invaluable across numerous applications. Understanding what constitutes a raised relief map is the first step before exploring the complex process required to create them.
The Foundation: Data Acquisition and Preparation
Every accurate raised relief map begins with accurate data. This initial stage is absolutely critical, as the quality and detail of the final physical product are directly dependent on the precision of the digital information used. Gathering and preparing this data is a meticulous process that involves several distinct steps.Gathering Topographic Data
The raw material for a relief map is elevation data, which records the height of the terrain at countless points across the target area. This data is acquired from various sources, including satellite imagery, aerial photography, radar mapping (like SRTM - Shuttle Radar Topography Mission data), and LiDAR (Light Detection and Ranging). Modern GIS (Geographic Information Systems) play a pivotal role here, allowing for the collection, storage, and analysis of this spatial data efficiently.GIS professionals work with vast datasets, often comprising millions or billions of elevation points, to create a detailed digital elevation model (DEM) or a triangular irregular network (TIN). The chosen data source and its resolution directly impact the level of detail that can be represented in the final map. Higher resolution data allows for finer terrain features to be included, resulting in a more accurate and detailed relief representation.
Data Processing and Refinement
Raw elevation data often contains errors, gaps, or inconsistencies that must be cleaned and processed. This refinement involves interpolation to fill missing data points, smoothing to remove noise, and ensuring the dataset is georeferenced correctly so it aligns with real-world coordinates. Software specifically designed for terrain modeling and GIS is essential for these tasks.A crucial part of this stage is deciding on the appropriate vertical exaggeration. As mentioned earlier, vertical scale is typically amplified relative to the horizontal scale to make relief features more pronounced. The degree of exaggeration chosen depends on the terrain itself (flat areas need more exaggeration than mountainous ones) and the intended use of the map, requiring careful consideration by the map designer. Applying this exaggeration early in the digital process is vital for creating the correct digital model that will guide the physical manufacturing.
Integrating Map Data
While elevation provides the form, the map data provides the visual information layered onto the relief. This includes geographical features like rivers, lakes, coastlines, as well as human-made elements such as political boundaries, cities, roads, and place names. This vector and raster data must be meticulously aligned with the elevation model.Integrating this data involves sophisticated graphical design and layout processes. The map design needs to be prepared specifically for printing onto a three-dimensional surface later, accounting for the distortion that will occur when a flat image is applied to a formed shape. This preparation includes planning for text placement, symbol scaling, and color schemes that will remain legible and accurate after the forming process. Accuracy in integrating both the elevation and the map data is paramount to creating a functional and informative raised relief map.
From Data to Physical Form: Creating the Master Model
With the digital elevation and map data prepared, the next significant step is translating this digital information into a physical, three-dimensional master model. This master will serve as the template for creating the molds used in mass production. It's a pivotal stage where digital design meets physical craftsmanship.Digital Modeling and Design
Using specialized software, the processed digital elevation model is used to create a precise digital 3D model of the terrain. This digital model is where the vertical exaggeration decided upon in the previous stage is fully realized in three dimensions. Designers refine the model, ensuring smooth transitions between elevation points and preparing it for physical output.The complexity of the terrain, the required level of detail, and the intended scale of the final map all influence the digital modeling process. This stage allows for final adjustments and checks of the relief before committing to creating a physical object. It's a digital prototype that must perfectly represent the desired final relief shape.
Prototyping and Testing
For complex or large projects, smaller-scale prototypes might be created at this stage. These prototypes allow manufacturers to physically review the relief, check the effect of the vertical exaggeration, and identify any potential issues before creating a full-size master. This testing phase helps catch errors early, saving significant time and resources down the line.Testing might involve 3D printing small sections of the terrain or using other rapid prototyping methods. Getting a physical representation, even a small one, provides valuable feedback that is difficult to obtain solely from viewing a digital model. It helps ensure that the final relief is both aesthetically pleasing and accurately represents the intended topography.
Crafting the Physical Master
The physical master model is a highly accurate, durable positive form of the terrain. This is typically created using subtractive or additive manufacturing processes directly from the approved digital 3D model. The choice of method depends on the size and complexity of the map.CNC Milling Explained
Computer Numerical Control (CNC) milling is a common method for creating master models, especially for larger maps. A block of durable material, often high-density foam, wood, or plastic, is placed in a milling machine. Guided by the digital 3D model, the machine's cutting tools precisely carve away material layer by layer, revealing the relief shape. This process is highly accurate and can produce very detailed masters.The milling process can take many hours or even days for large, complex maps, requiring multiple passes with different tools for rough shaping and fine detailing. Skilled operators ensure the machine runs smoothly and that the material is cut precisely according to the digital specifications. The resulting master is a robust physical representation ready for the next stage.
3D Printing for Masters
For smaller maps or masters with very intricate details, 3D printing is becoming an increasingly viable option. Additive manufacturing builds the master layer by layer directly from the digital model using materials like resin or plastic polymers. This can sometimes be faster than milling for specific geometries and allows for complex internal structures if needed.High-resolution 3D printers are required to achieve the necessary detail and accuracy for a map master. The choice between milling and 3D printing often comes down to factors like size, desired resolution, material properties, and production time. Regardless of the method, the resulting physical master is a crucial, highly accurate representation of the terrain that will be used to create the production molds.
The Heart of the Relief: Mold Creation
Once the physical master model is complete and verified for accuracy, the next step is to create production molds from it. These molds, typically negative impressions of the master, are what will be used repeatedly to form the plastic sheets into the desired relief shape. Creating durable and accurate molds is essential for consistent, high-quality map production.Types of Molding Materials
Production molds for vacuum forming, the primary method for creating the relief shape, need to withstand heat and pressure and maintain their shape through many cycles. Common materials include epoxy resins, fiberglass, or even cast aluminum for very high-volume production runs. The choice of material depends on the anticipated production volume and the desired mold longevity.Epoxy resins are often used for medium production runs due to their cost-effectiveness and ability to capture fine detail from the master. Fiberglass can provide more durability, while aluminum offers the highest durability for large-scale industrial production. Each material has specific properties that affect the casting process and the lifespan of the mold.
The Molding Process
Creating the mold involves casting or forming a negative impression directly from the physical master model. For casting, the master is prepared, and the liquid molding material is carefully poured over it, capturing every contour and detail. Air bubbles must be meticulously removed to ensure a flawless surface.Once the molding material cures and hardens, the mold is separated from the master. The resulting mold is a precise inverse of the master's terrain. For vacuum forming, a negative mold is required, meaning the mountains on the master become valleys in the mold, and vice versa. This ensures that when plastic is pulled into the mold, it replicates the positive relief of the terrain.
Ensuring Mold Durability and Accuracy
After creation, the mold is carefully inspected for any imperfections, such as bubbles, warps, or damage. Any flaws in the mold will be replicated in every map produced from it, so accuracy at this stage is paramount. The mold may also undergo finishing processes to smooth surfaces and enhance its durability.Proper curing of the molding material is essential to ensure the mold is hard and stable enough to withstand the temperatures and pressures of the forming process. A well-made mold can be used thousands of times, making the precision and durability built into this stage a significant factor in the overall efficiency and quality of the manufacturing process. This mold is truly the core tool for replicating the relief.
Bringing the Relief to Life: The Forming Process
With the mold ready, it's time to give the plastic sheet its three-dimensional shape. This is the stage where the flat material is transformed into the tactile landscape we recognize in a raised relief map. The most common technique used for this transformation is vacuum forming, a process specifically suited to shaping thermoplastic sheets over a mold.Understanding Vacuum Forming
Vacuum forming involves heating a sheet of plastic until it becomes pliable and then using vacuum pressure to pull it down tightly onto a mold. The plastic conforms to the shape of the mold, creating the desired relief. This process is relatively fast and cost-effective for producing multiple identical shapes.In the context of relief maps, a pre-printed flat plastic sheet (which we will discuss in the next section) is typically heated and then draped over the negative terrain mold. A vacuum is applied through small holes in the mold, sucking the air out from between the plastic sheet and the mold surface. The atmospheric pressure then pushes the softened plastic firmly against the mold, capturing all the details of the relief.
Selecting the Right Plastic
The type of plastic used is crucial for both the forming process and the final product's durability. Common materials include PVC (polyvinyl chloride), styrene, or PETG (polyethylene terephthalate glycol). These thermoplastics are chosen for their ability to become pliable when heated and retain their formed shape upon cooling.Factors influencing plastic selection include the required thickness, flexibility, printability, and cost. The plastic sheet must be robust enough to hold its shape, flexible enough to form intricate details without tearing or thinning excessively, and capable of accepting specialized printing inks. The properties of the plastic directly impact how well the vacuum forming process works and the quality of the finished map.
Heating and Forming the Sheet
The plastic sheet is clamped into a frame and moved into a heating element, typically radiant heaters, which heat the plastic evenly to its optimal forming temperature. The precise temperature and heating time are critical and vary depending on the plastic type and thickness. Overheating can damage the plastic, while underheating prevents it from conforming fully to the mold.Once heated to the correct pliability, the frame is quickly lowered, bringing the softened plastic into contact with the mold. The vacuum is applied almost simultaneously, pulling the plastic down and into the mold's contours. The speed and pressure of the vacuum must be carefully controlled to ensure consistent and accurate formation across the entire map surface.
The Cooling and Demolding Stage
After the plastic has fully formed to the mold, it must be allowed to cool sufficiently to solidify and retain its shape. Cooling can be accelerated with fans or chilled air circulating over the formed plastic and mold. Proper cooling is essential to prevent shrinkage or distortion after demolding.Once cooled, the vacuum is released, and the formed plastic sheet is carefully removed from the mold. This formed sheet now has the three-dimensional relief of the terrain. It is still part of a larger sheet with excess material around the edges that will need to be trimmed in a later stage. This stage successfully transforms a flat sheet into a tactile landscape.
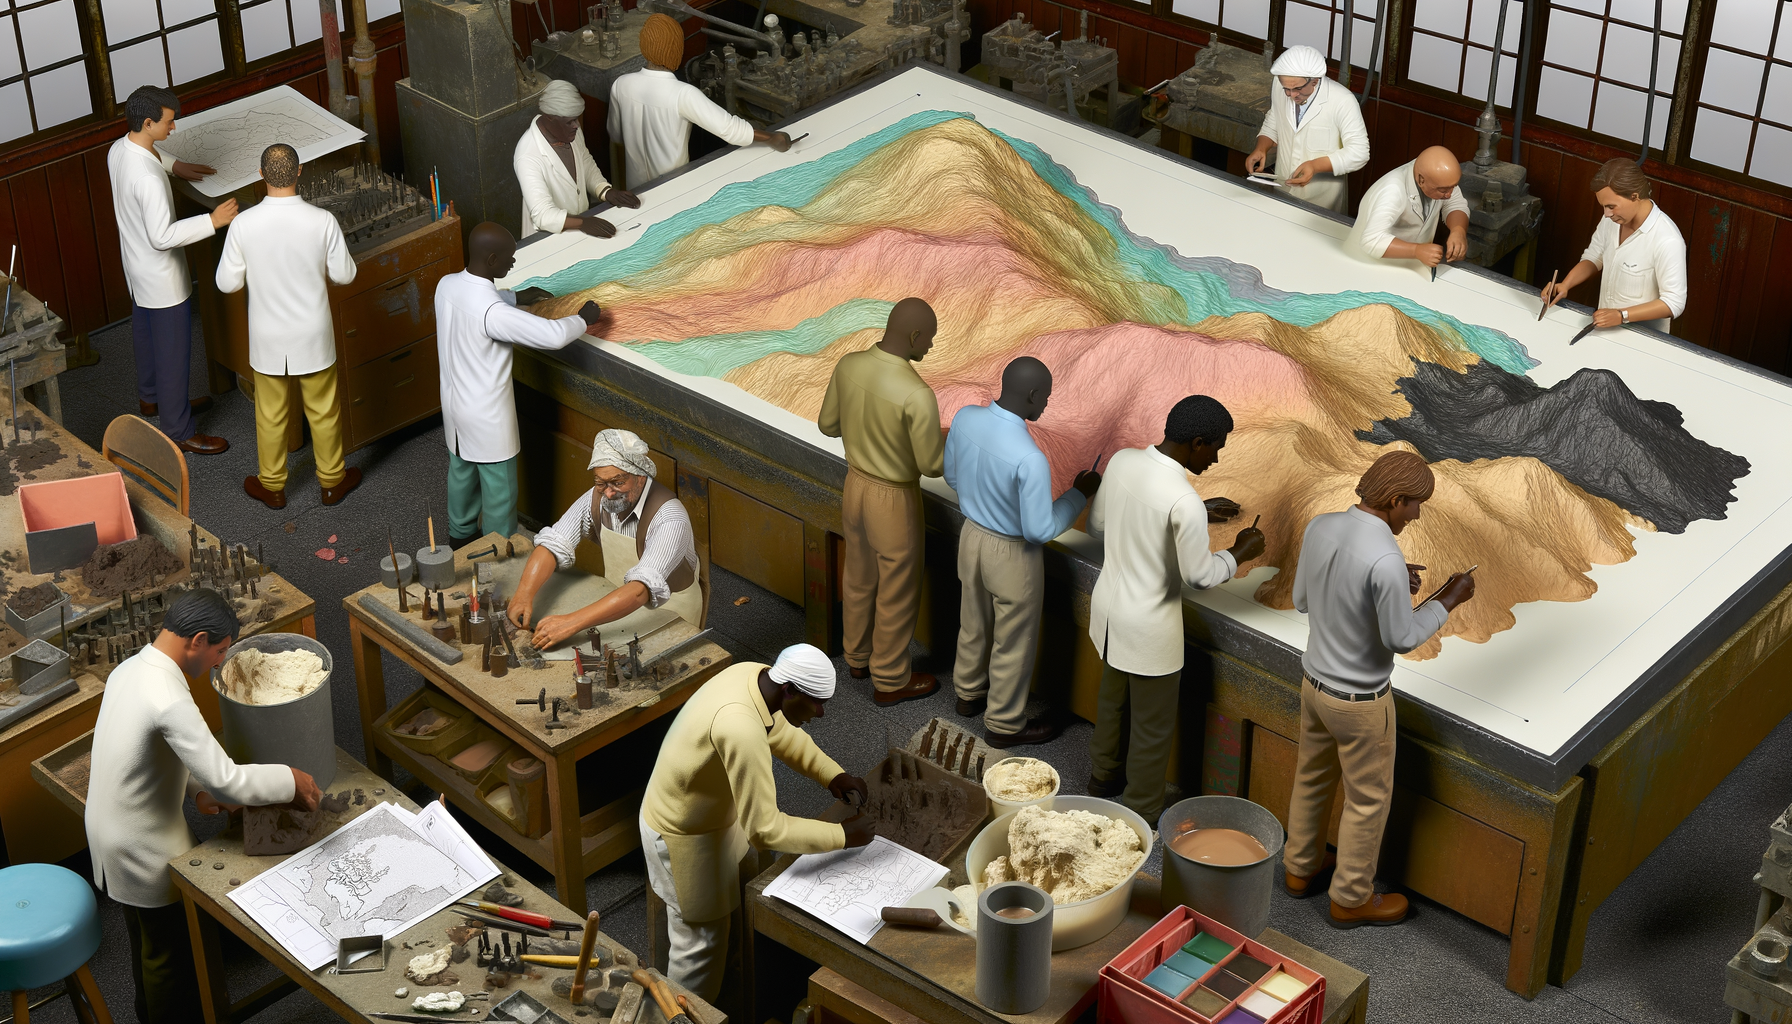
Layering Information: Printing the Map Image
Creating the relief shape is only half the battle; the detailed map information must also be applied accurately to this three-dimensional surface. This is one of the most technically challenging steps in the process, as it involves printing a two-dimensional image onto a non-flat object. The map design created in the data preparation stage is specifically formatted for this complex printing task.Challenges of Printing on a Three-Dimensional Surface
The primary challenge is image distortion. If a standard flat map image were simply applied to the plastic sheet *before* forming, the stretching and pulling of the plastic during the vacuum forming process would severely distort the image, making geographical features and text appear warped and out of place. Conversely, trying to print onto the formed surface presents challenges with uneven surfaces and achieving registration.To overcome this, the map image is printed onto the *flat* plastic sheet *before* it is vacuum formed, but the image itself is pre-distorted in a way that compensates for the expected stretching during forming. This requires sophisticated software and calibration to predict precisely how much each part of the image needs to be compressed or stretched so that it appears correct after the plastic takes its three-dimensional shape. This pre-distortion is a critical design step.
Specialized Printing Techniques
Several printing methods can be used, each adapted for the specifics of printing on plastic sheets intended for forming. Offset printing is common for high volumes, using flexible plates and inks specifically designed for thermoplastics. Screen printing is another option, particularly for thicker ink deposits or specific color requirements. Digital printing is increasingly used for shorter runs or maps requiring highly variable data, offering flexibility in design.Regardless of the method, the inks must be durable, flexible, and capable of adhering well to the plastic surface during and after forming. The printing process must also maintain extremely tight registration (alignment) of different color layers. Misregistration would result in blurry or misaligned map features on the final product.
Ensuring Color Accuracy and Alignment
Achieving accurate color reproduction is vital for map legibility and aesthetics, especially when using standard cartographic color conventions for elevation, water bodies, and land cover. The printing process must consistently apply inks to match the desired color profile, which can be tricky on plastic substrates.Even more critical is the precise alignment of the pre-distorted map image with reference points on the flat plastic sheet, which correspond to specific locations on the mold. These registration marks guide the placement of the plastic sheet during the vacuum forming process. If the printing is misaligned or the sheet is improperly registered on the mold, the printed map features will not align correctly with the raised relief, resulting in a useless map. This stage beautifully illustrates the technical finesse required.
Refining the Product: Trimming and Finishing
After the plastic sheet has been vacuum formed and printed, it exists as a large, formed sheet containing one or more maps surrounded by excess material. The next steps involve separating the finished maps and adding any final touches to make them ready for use or display. This stage focuses on precision and presentation.Precision Trimming Methods
Removing the excess plastic from around the formed map requires precise trimming. This is often done using automated methods like die-cutting or CNC routing. Die-cutting uses a custom-made steel rule die, shaped precisely to the outline of the finished map, to punch through the plastic sheet. This is efficient for high-volume production of standard map sizes.CNC routing uses a computer-controlled cutting tool to follow a digital path, trimming the plastic with high accuracy. This method is more flexible for different map sizes and shapes and is often used for custom or lower-volume runs. Accurate trimming is essential to give the map clean edges and its final shape, removing the web of surrounding plastic.
Adding Backing or Mounting
Many raised relief maps are mounted onto a rigid backing material, such as foam core, cardboard, or even wood, for structural support and ease of handling or display. This backing prevents the relatively thin formed plastic from bending or cracking and provides a surface for hanging or framing. The formed and trimmed plastic map is typically adhered securely to this backing.For maps intended for framing, a border or matte might be added during the mounting process. Educational maps might be backed onto sturdy foam core that allows for pins or markers to be inserted. The mounting process enhances the map's durability and prepares it for its intended application.
Applying Protective Coatings
To protect the printed surface from UV light, dust, and abrasion, a protective coating or laminate is often applied. This can be a clear spray coating or a thin plastic film laminated onto the surface. This final layer helps preserve the colors and details of the map, ensuring its longevity, especially for maps that will be frequently handled or displayed in areas with sunlight.The choice of coating depends on the intended use and desired finish (matte or glossy). This protective step is important for maintaining the map's visual quality and tactile integrity over time. It adds a layer of resilience to the finished product.
The Final Check: Quality Control
Before packaging and shipping, each raised relief map undergoes a rigorous quality control inspection. This is a critical stage to ensure that the finished product meets the manufacturer's standards and the customer's expectations. Quality control checks are performed throughout the process, but a final inspection of the finished product is essential.Checking for Forming Defects
Inspectors carefully examine the formed relief for any defects that may have occurred during the vacuum forming process. This includes checking for thin spots, uneven stretching of the plastic, areas that didn't form fully into the mold's details, or sink marks. Any inconsistencies in the relief shape are noted.Issues at this stage could indicate problems with the mold, the plastic material, the heating temperature, or the vacuum pressure. Identifying these defects ensures that only perfectly formed maps move forward for packaging. Consistent relief is key to the map's function and appearance.
Verifying Print Alignment and Color
A crucial check is verifying that the printed map image aligns correctly with the formed relief. This involves visually inspecting key geographical features and labels to ensure they are positioned accurately relative to the peaks, valleys, and contours. Misalignment indicates an issue with the initial image pre-distortion, printing registration, or the forming process registration.Color accuracy is also verified against standards or proofs. Colors should be consistent across the map and match the intended design. Any significant deviations in color or print clarity would lead to the map being rejected.
Inspecting Overall Accuracy and Detail
The final check involves an overall assessment of the map's accuracy and the clarity of its details. This includes verifying that major geographical features are correctly represented in the relief, that names and symbols are legible, and that the trimming is clean and precise. The tactile feel of the relief is also considered, ensuring it provides the expected representation of the terrain.Maps that pass all these inspections are deemed ready for packaging and distribution. This multi-point quality control process is vital for maintaining the reputation of the manufacturer and ensuring customer satisfaction with a product that is both geographically accurate and physically impressive.
Packaging and Distribution
The final stage of the manufacturing process involves carefully packaging the finished raised relief maps to protect them during transit and distribution. Given their three-dimensional nature, they require more robust packaging than flat maps to prevent damage to the formed relief and edges. Maps might be individually wrapped or sleeved and then boxed, often with protective padding.For educational or retail purposes, packaging is also designed to be informative and appealing, often including details about the map's scale, area covered, and key features. Efficient distribution channels ensure the maps reach schools, retailers, government agencies, and individual customers worldwide.
The Intersection of Art and Science
The manufacturing of raised relief maps is a remarkable testament to the blend of artistic design and scientific precision. It requires not only sophisticated technology and engineering but also a deep understanding of cartography and visual communication. Each map is the result of complex data processing, intricate mold making, precise thermoforming, and challenging printing techniques.From the initial data points gathered from satellites to the final trimmed and mounted product, every step demands expertise and attention to detail. The result is a product that is both highly informative and aesthetically compelling, offering a unique way to engage with geography.
Conclusion: Appreciating the Complexity of 3D Maps
As we have journeyed through the various stages of creating a raised relief map, it becomes clear that these are far more than simple objects; they are products of an intricate and fascinating manufacturing process. The complexity starts with handling vast amounts of geographical data, transforming it into a precise digital model, and then painstakingly creating a physical master. This is followed by the crucial step of mold making, which captures the negative space of the terrain with high fidelity.The forming process, typically vacuum forming, physically transforms a flat plastic sheet into the three-dimensional relief using heat and pressure. Simultaneously, or often before forming, the complex challenge of printing a pre-distorted map image onto the plastic must be successfully executed so that it aligns perfectly with the relief after shaping. Finally, precision trimming, finishing, and rigorous quality control ensure that each map is accurate, durable, and visually appealing.
The creation of raised relief maps stands as a testament to human ingenuity, combining advanced technology like GIS and CNC milling with traditional skills in molding and finishing. The next time you encounter one of these remarkable maps, perhaps in a classroom, a museum, or an office, you can appreciate the incredible journey it took to get there. It is a product that brings the topography of our world to life, not just visually, but in a way that you can physically touch and explore, offering a truly unique perspective on the landscape.